Total Pageviews

Showing posts with label recipe. Show all posts

Tuesday, December 21, 2010

Feeding the neighbours

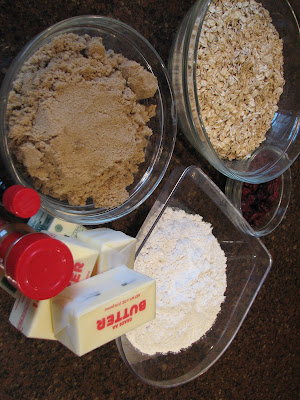
The time had come for us to wish our neighbours a merry Christmas and thank them for always being there when we have called upon them over the past year. We're quite lucky to have such a kind and kid friendly street and the way we show our gratitude is with baked goods of course. This year I made a batch of oatmeal cranberry cookies and then they were passed over to Maura who had bought some cool little boxes from Cost Plus. She filled them with the swag and made them all pretty with some ribbon. Finished off with a tag made from one of the awesome pictures from our photo shoot with our friend Miranda, http://mshantiphoto.com/ and they were ready for delivery. The elves in charge of distribution were little Miranda and her friend Devon who braved the rain and made sure the boxes made it to the front doors safely. A great team effort by all.

The recipe I used was from The Joy of Baking.

3/4 cup (170 grams) unsalted butter, room temperature
1 cup (210 grams) packed light brown sugar
1 large egg
1 teaspoon pure vanilla extract
3/4 cup (105 grams) all purpose flour
1/2 teaspoon baking soda
1/2 teaspoon salt
1/2 teaspoon ground cinnamon
3 cups (260 grams) old-fashioned rolled oats
1 cup dried cranberries, cherries, or raisins or 1 cup white or dark chocolate chips (optional)
Preheat oven to 350

In the bowl of your electric mixer (or with a hand mixer), beat the butter and sugar until creamy and smooth (about 2 - 3 minutes). Add the egg and vanilla extract and beat to combine. In a separate bowl, whisk together the flour, baking soda, salt, and ground cinnamon. Add the flour mixture to the creamed mixture and beat until incorporated. Stir in the nuts, oats, and dried cranberries or chocolate chips.
For large cookies, use 1/4 cup of batter and space the cookies about 2 inches (5 cm) apart on the baking sheet. Then wet your hand and flatten the cookies slightly with your fingers so they are about 1/2 inch (1.25 cm) thick. Bake the cookies for about 12 - 15 minutes or until light golden brown around the edges but still soft and a little wet in the centers. Remove from oven and let the cookies cool a few minutes on the baking sheet before transferring them to a wire rack to cool.


Sunday, November 21, 2010

Thanksgiving.

Yes I do have another recipe on here. This started out being a blog about my antics and happenings with the family after becoming a stay at home dad. Well it still is but I do like to cook and oddly enough take pictures of that food much to the amusement of Miranda who wonders why I'm snapping pics of her dinner. There are many food blogs out there and I don't know what reason the blogger's would give as to why they document there cooking exploits. I'm sure theres an element of proudness and genuine love for food. I think food is much more than just an object which goes in your mouth, chewed and forgotten about, it's almost sensual in many ways. Every day I think about what I can make for that evenings dinner and rarely plan a day in advance, call me crazy but I usually go to some kind of grocery store everyday. Maura thinks I'm mad and would rather I done one large shop per week. I say how can you do that if you don't know what your going to make? 

In between all of the grocery trips and kitchen photography I do still find time to look after Miranda and Quinn. Miranda is doing well at school although she may need a reality check on her bossiness in the very near future according to her teacher. Kindergarten is tougher than we thought it would be. Quinn just keeps growing and is enjoying his solid foods now,all of which I make myself.  He is almost nine months old and started to crawl last week trying to reach and grab for anything that catches his eye. I had forgotten these milestones but now they are returning with great eagerness. With an upcoming week of no school we are going to get ready for thanksgiving with the rest of the family, which means more trips to the store.... 

The recipe below is definitely a keeper. The beef was fork tender and the sauce which came from  reducing down the liquid was deep and intense. If you make it give yourself some time. It's pretty easy once all of the prep work is done and you can do all of the cooking at the beginning in a large saute pan if your dutch oven or casserole dish is not stove top friendly, just make sure it's in the oven heating as you don't want to add the veggie mix to a cold dish. I made some mashed potatoes with loads of butter, milk, salt and pepper and added a little truffle oil.

Here's the recipe adapted from Simply Recipes.com

1 (3 1/2 pound) chuck roast, boneless

Salt and ground black pepper
4 oz pancetta, cut into 1/4-inch cubes
2 medium onions, chopped medium (about 2 cups)
2 medium carrots, chopped medium (about 1 cup)
2 ribs celery, chopped medium (1 cup)
1 Tbsp tomato paste
3 medium cloves garlic, minced or pressed through garlic press (about 1 tablespoon)
1/2 teaspoon sugar
1 Tbsp all-purpose flour
1 (750 ml) bottle Zinfandel wine (can substitute Cabernet Sauvignon)
1 can (14 1/2 ounces) diced tomatoes , drained
1 sprig fresh thyme leaves , plus 1 teaspoon minced leaves
1 sprig fresh rosemary
10 sprigs fresh parsley leaves

Adjust oven rack to middle position; pre-heat oven to 300°F. Pat beef dry with paper towels. Place pancetta in 8-quart heavy-bottomed Dutch oven. Cook pancetta over medium heat, stirring occasionally, until browned and crisp, about 8 minutes. Using slotted spoon, transfer pancetta to paper towel-lined plate and reserve. Pour off all but 2 tablespoons fat from the pan. Place pan over medium-high heat. Heat until the fat begins to smoke. Add beef to pot and cook until well browned on all sides, about 8 minutes total. Transfer beef to large plate; set aside.

Reduce heat to medium; add onions, carrots, celery, and tomato paste to pot and cook, stirring occasionally, until vegetables begin to soften and brown, about 6 minutes. Add garlic, sugar, flour, and reserved pancetta; cook, stirring constantly, until combined and fragrant, about 30 seconds. Add wine and tomatoes, scraping bottom of pan with wooden spoon to loosen browned bits; add thyme sprig, rosemary, and parsley. Return roast and any accumulated juices to pot; increase heat to high and bring liquid to boil, then place large sheet of foil over pot and cover tightly with lid. Set pot in oven and cook, using tongs to turn beef every 45 minutes, until a fork easily slips in and out of meat, about 3 hours.

Remove from oven and transfer beef to cutting board; tent with foil to keep warm. Allow braising liquid to settle about 5 minutes, then, using wide shallow spoon, skim fat off surface. Add minced thyme, bring liquid to boil over high heat, and cook, whisking vigorously to help vegetables break down, until mixture is thickened and reduced to about 3 1/2 cups, about 18 minutes. Strain liquid through large fine-mesh strainer, pressing on solids with spatula to extract as much liquid as possible; you should have a couple cups strained sauce. Reduce sauce further until you have 1 1/2 cups. Discard solids in strainer. Season sauce to taste with salt and pepper.


 Frying the pancetta


 Make sure you buy two bottles and keep one for while the roast is in the oven.

 I don't have a dutch oven so I use the ceramic inside of a crock pot. I done all of the mixing in a large saute pan first whilst pre heating the crock pot in the oven.

 31/2 hours later, rich in color and the meat reminds me of an alligator rising from a swamp.

 After straining all the veggies and other bits this is all you have left. Boil it high and reduce it down by half,season it and the flavor is amazing, after all theres a full bottle of wine in there!


Tender, sticky, flavorful, I could go on and on....make it!!!

Friday, November 12, 2010

mangi,mangi

I was going to make chicken tacos with the left over rotisserie meat but I decided to take the road to The Leaning Tower and this is what I came up with. You cant really go wrong with pizza and there's so many variations you could decide upon. Follow a few simple rules like not overdoing it with the toppings and rolling that crust out super thin and many faces will be smiling around the table. Not a lot of us have wood burning stoves in our kitchen so crank that oven up high and place the pizza straight onto the oven deck. I use a flattened out serving platter as a means to scooping the pizza up and transferring it to the oven. Keep turning it if you have to prevent it from burning.If you decide to make your own try the dough balls from Whole Foods, you can get them over by the deli where they use the same dough to make the store pizzas, they are way more original than Trader Joes and I am a fan of TJ's but their dough is terrible. Once you get your dough leave it out at room temp for at least 30 minutes. This makes it easier to roll out and makes for a nice chewy crust. Make sure to par bake the rolled out crust in a 450 degree oven for 5-7 minutes and this will make it strong enough to hold those toppings.


  The dough ready for its first bake with an olive oil glaze


   My choice of sauce


After the first bake


  I used some smoked fontina cheese


 Ready for the oven, 450 degrees


 Topped with some fresh basil


 Ready to eat


Thursday, October 28, 2010

Pumpkin and ginger scones

If you like food as much as I do, then this time of year is a great chance to give your taste buds a workout. So many seasonal items are in abundance right now and none more so than the grandmaster of them all, the pumpkin!
I'm going to come right out and say it. Yes one of my choice coffee's would be Starbucks. Wait before I'm booed and pelted with rotten gourds I'm not attracted by the company and their alluring shops and I'm definitely not a latte frappe doppia kinda guy. I just like their strong fresh bold blends and also the pumpkin scones they push out at this time of year. Yes those scones which inspired me to make some today. I actually came across the original recipe for the Starbucks scones and then I adapted it by throwing in some chopped up pieces of candied ginger which I need to move out of the pantry. I just ate one and I was pleasantly surprised at how similar they actually were to the ones on sale. The only difference being the thickness of the frosting. Also don't be shy with the spices, I added some extra just because I like that fall flavor.

So here's the recipe adapted from Food.com,


2 cups all purpose flour
7 tablespoons sugar
1 tablespoon baking powder
1/2 teaspoon salt
1/2 teaspoon ground cinnamon
1/2 teaspoon ground nutmeg
1/4 teaspoon ground cloves
1/4 teaspoon ground ginger
6 tablespoons cold butter
1/2 cup canned pumpkin
3 tablespoons half-and-half
1 large egg
1/2 cup chopped candied ginger (if you like it)
Powdered Sugar Glaze
1 cup powdered sugar
1 tablespoon powdered sugar
2 tablespoons whole milk
Spiced Glaze
1 cup powdered sugar
3 tablespoons powdered sugar
2 tablespoons whole milk
1/4 teaspoon ground cinnamon
1/8 teaspoon ground nutmeg
1 pinch ginger
1 pinch ground cloves

 Preheat oven to 425 degrees F. Lightly oil a baking sheet or line with parchment paper.
3 Combine flour, sugar, baking powder, salt, and spices in a large bowl. Using a pastry knife, fork, or food processor, cut butter into the dry ingredients until mixture is crumbly and no chunks of butter are obvious. Set aside.
4 In a separate bowl, whisk together pumpkin, half and half, and egg. Fold wet ingredients into dry ingredients. Form the dough into a ball.
5 Pat out dough onto a lightly floured surface and form it into a 1-inch thick rectangle (about 9 inches long and 3 inches wide). Use a large knife or a pizza cutter to slice the dough twice through the width, making three equal portions. Cut those three slices diagonally so that you have 6 triangular slices of dough. Place on prepared baking sheet.
6 Bake for 14?16 minutes. Scones should begin to turn light brown. Place on wire rack to cool.


  • TO MAKE THE PLAIN GLAZE:.

  • Mix the powdered sugar and 2 tbsp milk together until smooth.

  • When scones are cool, use a brush to paint plain glaze over the top of each scone.

     AS THAT WHITE GLAZE FIRMS UP, MAKE THE SPICED ICING:.
    Combine the ingredient for the spiced icing together. Drizzle this thicker icing over each scone and allow the icing to dry before serving (at least 1 hour).